How to Self-Tan Your Hands, Wrists, Elbows, Ankles, and Back


While self-tanning makes it more convenient to have a year-round glow, it’s not always easy. Even after finding the right self-tanner product that helps you achieve an even, natural bronze tan, it can still be tricky knowing exactly how to tan trouble spots, like your hands and wrists; it also takes a little practice to apply self-tanner to hard-to-reach areas like your back. I’ve been self-tanning for over a decade and have finally mastered the tips and tricks that give me a streak-free tan from head to toe. Keep reading for my ultimate guide on how to tan your hands, wrists, feet, ankles, back, ears, and underarms.
how to tan your hands
Self-tanning your hands may be intimidating, but it doesn’t have to be difficult. Here’s what I recommend:
Use a mousse, not a lotion, as a lotion is more likely to settle into the natural creases of your hands, no matter how hydrating it is. I also prefer an express mousse; we use our hands constantly, so a quicker-developing tan is much more convenient (and less likely to mess up) than the longer formulas.
This isn’t a tan that you want to leave overnight; I prefer to do this about an hour before my shower/ bedtime routine.
Your hands are drier and more likely to absorb the self-tanner, which is why they often look darker than intended. To get around this:
Apply self-tanner to the rest of your body as you usually would; use my tips on applying self-tanner to your wrists so there aren’t any harsh lines. You want the tanner to be buffed out from your wrists onto your backs of your hands only using what’s leftover on the blending brush. Too much product will make your tan streaky or splotchy.
If you notice your fingers feel dry or have dry patches, apply a hydrating but non-greasy lotion to moisturize them and soften the patchiness prior to applying self-tanner. I like this lotion best; it’s cheap and works well as a barrier cream but isn’t greasy.
Don’t apply self-tanner to your fingers right away. I wait until about 45 minutes before I wash my tan off to apply any product. For a more subtle tan, 30-35 minutes or so will do.
To tan your hands, use a blending brush to lightly “paint” the tanner on.
Your hands are highly absorbent; you do not need to use as much self-tanner as you think. I use maybe the size of a penny or so. If you accidentally pump too much self-tanner onto your brush, you can buff the excess onto your stomach or chest.
Slightly bend your fingers; you don’t want a full bend because the tanner will seep into the creases.
Gently apply the tanner to your hands and fingers. You don’t need to worry about getting in between your fingers; I find that looks really unnatural. I also am careful around my fingertips; you don’t want to have a harsh line stopping at the top third of your fingers entirely, but with how absorbent your cuticles are, less is definitely more. I wear nail polish so I tend to do one very light brush of the tanner. You don’t need to see the color guard on your fingertips to know you’ve applied the tanner; you can trust that some product will be absorbed.
Don’t keep your hands robot-still while your tanner absorbs, but don’t do too much activity. I’ll scroll through my phone, read, or type on my laptop.
Wash your tanner off as normal, then follow-up with lotion to bring hydration back into your hands. I like this lotion - it’s hydrating but not greasy; the tanner will still come through, but it also help soften the results.


how to tan your wrists
I personally prefer to use an express self-tanning mousse instead of a lotion when it comes to tanning my wrists. While lotions are more moisturizing and seem easier to blend in, I find them to be streakier and easier to mess up, especially since they take longer to develop. Here’s how to avoid streaks:
Start by tanning your shoulder and working your way down your arm. I use a full pump of self-tanning mousse and apply it directly onto my mitt; the mousse glides easily so you don’t need to use half a pump for the top half of your arm and then another half a pump for the bottom half, but you can if that’s easier for you.
Take the self-tanning mousse down to your wrist. There should be minimal product leftover, just enough to see a little bit of color on your wrist, but not so much that it’s hard to blend out. Don’t forget the back of your hands, too.
Then, take a blending brush and buff the tanner out completely so there are no harsh lines. Make sure to get the sides of your wrist, but you don’t want to get your palms. If you mess up, wet a washcloth with water and lightly rub it off. Then go back with your blending brush so there are no harsh lines.
I like these washcloths, which are technically kitchen towels, because they’re cheap, the perfect mix of soft yet abrasive and self-tanner marks wash out really easily.
Keep in mind that your wrists naturally don’t get as much of a tan as the tops of your arms or shoulders. If you’re using a self-tanner with a color guard (which I recommend), you don’t need to worry about the color of your wrists matching your shoulders when you initially apply the self-tanner. Once you wash the tanner off, everything will look very even, natural, and blended.
Let your tan set and develop; be careful about not getting your wrists wet and accidentally washing some of the tanner off, which will result in streaks. I try to avoid doing the dishes or laundry while my self-tanner develops.


how to tan your elbows and knees
Elbows and knees are notorious trouble spots when it comes to self-tanning because they’re so dry. Here’s the best way to self-tan without any patchiness:
After you shower and dry off completely but before you start applying self-tanner, apply a thin layer of lotion to bring hydration back into your elbows and knees.
You don’t need much at all; you just want those areas to feel moisturized. Any leftover lotion that doesn’t get absorbed will prevent the tanner from applying, which is how you get streaks or light spots.
Don’t rush this part; I like to wait 5-10 minutes before I start self-tanning.
Start self-tanning. I like to use a mousse and start at my legs and work my way up, typically skipping my knees until my legs are done. Then use whatever product is leftover on the mitt to go over your knees once or twice. Knees are drier, so they’ll absorb the color better and do not need as much self-tanner as the rest of your body.
If you’re using a self-tanning lotion instead, use a very tiny amount - just enough to evenly coat your knees; the dryness means they’ll absorb the color better than your thighs, for example, so they don’t need as much product. Rub the lotion in so that it feels even, but you don’t have to spend tons of time working the product in (that might cause a darker patch, anyways). Think of it like applying a thin crumb coat, except you don’t have to go back over and it will look much more even in the end.
For your elbows, start by applying self-tanner to your shoulders and work your way down your arm. Don’t forget your inner forearm; that’s one spot I tend to forget about. Just like your knees, slightly bend your elbows and use whatever product is leftover to lightly brush over your them. One pass should be enough.
If you’re using a self-tanning lotion, treat it again like a crumb coat and just do a quick, single pass that feels even but not thickly coated.
After I wash the tanner off (mousse or lotion), I always make sure to apply extra moisturizer afterwards. This brings hydration back into these areas and will kind of prevent patches by buffing out any creases or dry spots.
how to tan your feet and ankles
Feet and ankles are notoriously difficult to tan. For a streak-free tan, here’s what I recommend:
Use a mousse and mitt instead of a lotion, which clings to the dry patches and is more likely to result in a streaky tan.
I tend to get a dry patch right around my ankle bone, so I’ll apply a small amount of hydrating lotion to fill out the dry posts and serve as a barrier cream. You don’t need much; you want the lotion to fully absorb or else you may get an uneven tan.
I’ll also sit and apply lotion to the bottoms of my feet, slightly blending it around the “edges” so that the tanner doesn’t cling to those dry patches you sometimes get around your heel.
Also apply a little bit of lotion onto your toes, as the cuticles are drier and can really cling to the tan.
Whether you tan the lower or top half of your legs first, save your feet and ankles for last.
Take whatever product is leftover on your mitt and lightly use circular motions to tan your ankles, working your way down to your feet.
Your feet are naturally drier, so they’ll tan easier than the rest of your body. As such, you do not need the initial appearance of the color guard to “match” the rest of your body. It’s ok if it looks like there’s less tanner on your feet/ ankles, as it will even out by the time the tanner fully develops.
Use a blending brush to buff out any harsh lines. I typically find there’s a little bit of product left on the brush from tanning other parts of my body, but if you need to apply a little bit of self-tanner onto the brush to even things out, you can.
Use the mitt and whatever product is leftover to brush over your toes once or twice; you can also use the brush if that’s easier. This is just to make sure there aren’t any lines where the tanner starts or stops, but you do not need to apply any additional product as that is too much.
After you wash the tanner off, apply extra lotion afterwards. This brings hydration back into these areas and will almost prevent patches by buffing out any creases or dry spots. You don’t want to use an oil or anything too greasy, as that breaks the tanner down quicker and can diminish your results.
how to tan your back
One of the few downsides to living alone is struggling to self-tan your back evenly. I’ve practiced a lot over the years, and here’s how I get an even tan on my back by myself:
Self-tanning mousse is easier to apply to your back than lotion; this one is my favorite.
Some people tan their backs first since you have to contort your body into awkward positions to get your back. I avoid streaks by tanning my arms, chest, neck, and sides first, then my back, then my stomach last to blend it all together.
To start, use a traditional mitt to get as much of your back as possible. Even if you’re not ambidextrous, switch the mitt onto your non-dominant hand, too.
I alternate between reaching over my shoulder as well as under, and use both hands to get all sides of my back.
You’ll probably have just a small space in the center of your back left. Use this tool to get that last part of your back. It has a sponge side as well as a padded side that’s the same fabric as a tanning mitt; I don’t really use the sponge side because I think it absorbs too much of the tanner, but some find it easier to use.
Apply the self-tanner directly to the side you’re going to use. Take your buffing brush and spread the tanner out a little bit; you should still see some foam sitting on top (not all soaked in). The wider your spread the tan, the easier it is to apply to your back.
I alternate between up-and-down motions as well as side-to-side and circles. The self-tanning mousse I use doesn’t streak, so I’m not super concerned if the application itself looks a little streaky.
Leave it on for the same amount of time as the rest of your tanner, and then rinse it off normally.
how to tan your ears
Even if you skip face self-tanner and opt for bronzing drops or contouring, you don’t want to neglect your ears. Applying makeup to your ears is inconvenient and messy; even though I don’t apply self-tanner to my face, I always make sure to get my ears.
I only use self-tanning mousse for this; lotions and tanning drops are too finicky, especially with all the natural folds of your ear.
Use a large foundation brush, which is gentler, more subtle, and provides even color (no patches or dark spots). I keep an extra brush just for tanning instead of using my actual makeup brush, since it might stain your brush. This one is around $20 but has lasted me over a year and doesn’t shed; this is a great option under $10.
You don’t need to add any new product onto the brush; just use what’s leftover.
I like to apply self-tanner to my neck, chest, and arms using a traditional mitt.
Then, I use the foundation brush to blend the tanner on my forearms into my wrists and onto my hands, so there are no harsh lines.
Use the leftover self-tanner (you don’t need much) to lightly apply the tanner to your ears.
Even with a color guard (tinted) self-tanner, it oftentimes won’t look like I’ve applied anything to my ears, but when I wash my tan off, I get subtle color that makes everything blend together, from my chest and neck to my face and ears.
When you wash the tanner off in the shower, the tanner will naturally wash off your ears, especially if you wash your hair. Be careful, because you don’t want to accidentally get water stuck in your ears.
Don’t forget to clean your ears with a Q-tip after; that gets any leftover self-tanner off with ease.
how to tan your underarms
One question I get asked a lot is if I tan my underarms, or how to do it. I personally skip my underarms, but get everywhere else around it. I don’t notice a major color difference; my tan still looks natural. I have self-tanned my underarms before, and if you want to do that, here’s how:
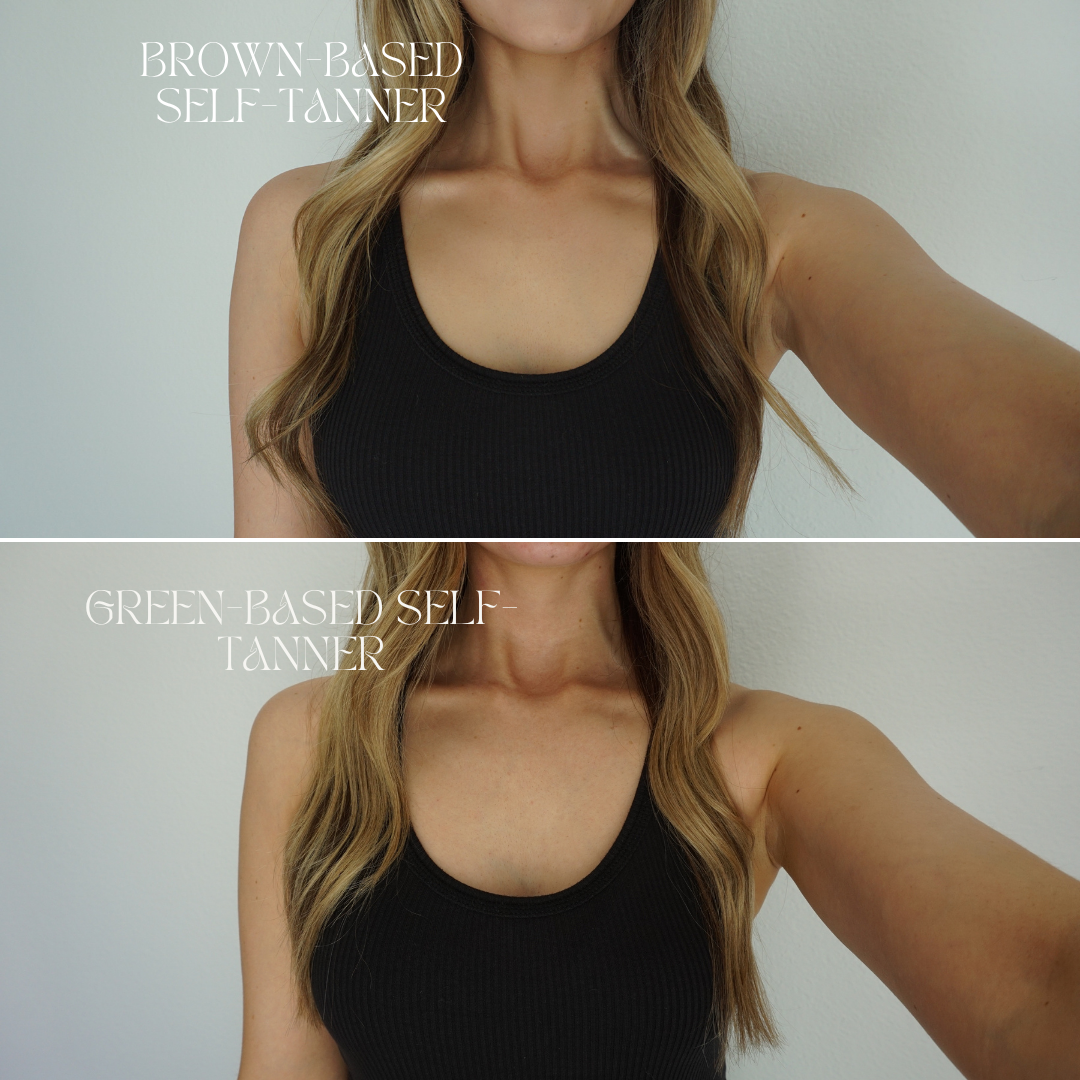
Wash all the deodorant or anti-perspirant off. My skin is very sensitive and I use a gentle body wash, so I’ll sometimes use a teensy bit of shampoo to make sure any residue is completely gone. Self-tanner can temporarily turn green when it mixes with deodorant, so this really is the most important step.
Use an express mousse instead of a lotion; you sweat in your sleep naturally, so a quicker tanner will give you results without worrying about sweating accidentally. I like this mitt when I use a mousse.
Apply the self-tanner to your arms; start at your shoulders and work your way down. I personally use a full pump of self-tanner, but you may need more.
You don’t need to have tanner on your underarms for as long as the rest of your body, so wait until about 30 minutes before you’re going to wash your tanner off.
Then, apply a quarter pump (less than you think you need) and lightly go over your underarms once or twice.
Leave your arms out by your side while the tanner dries; reaching upwards might crease the tanner on your shoulders. Make sure the tanner dries fully, then you can lower your arms.
Wear a loose fitting dark shirt while your tanner develops, and make sure it doesn’t have any deodorant residue on it.
Even the express mousses take more time to fully develop to maximum results, so I apply it in the evenings, shower it off before bed, and then let it continue to develop in my sleep. Don’t apply deodorant before bed; it’ll help you avoid the green tint or any patchiness/ streaks.